I spent this past week on investigating a collection of various problems surrounding how Calc draws cell borders. The problem is very hard to define and can become very subjective depending on who you talk to. Having said that, if you ever imported an Excel document that makes elaborate use of cell borders into Calc, you may often have seen that the borders were printed somewhat differently than what you would have expected.
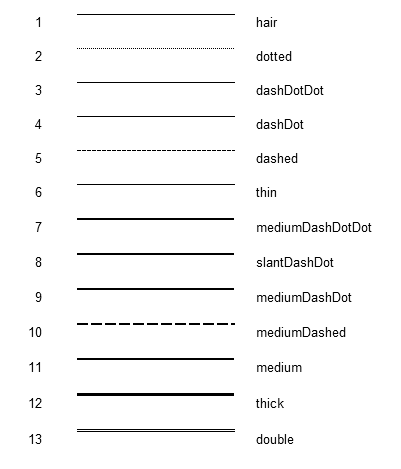
Here is an example. This is a very small test Excel document that I made that contains all cell border types that Excel supports. When you open this document in Excel and print it on paper, here is what you get.
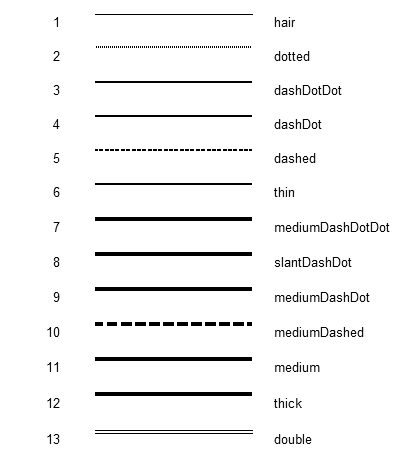
When you open this document in Calc and print it, you probably get something like this:
You’ll immediately notice that some of the lines (hair, dashed and double lines to be precise) are not printed at all! Not only that, thin, medium and thick lines are a little skinner than those of Excel’s, the dotted line is barely visible, the medium dashed line looks a lot different, and the rest of the dashed lines all became solid lines.
Therefore, it was time for action.
Results
I’ll spare you the details, but the good news is that after spending a week in various parts of the code base, I’ve been able to fix most of the major issues. Here is what Calc prints now using the build from the latest master branch:
There are still some minor discrepancies from Excel’s borders, such as the double line being a bit too thinner, the dotted line being not as dense as Excel’s etc. But I consider this a step in the right direction. The dashed and medium dashed lines look much better to my eye, and the thicknesses of these lines are more comparable to Excel’s.
The dash-dot and dash-dot-dot lines still become solid lines since we don’t yet support those line types, but that can be worked on at a later time.
So, this is all good, right?
Not quite. One of the reasons why the cell borders became such a big issue was that we previously focused too much on getting them to display correctly on screen. Unfortunately, the resolution of a typical PC monitor is not high enough to accurately depict the content of your document, so what you see on screen is a pixelized approximation of the actual content. When printing to a paper, on the other hand, the content gets depicted much more accurately simply because you get much higher resolution when printing.
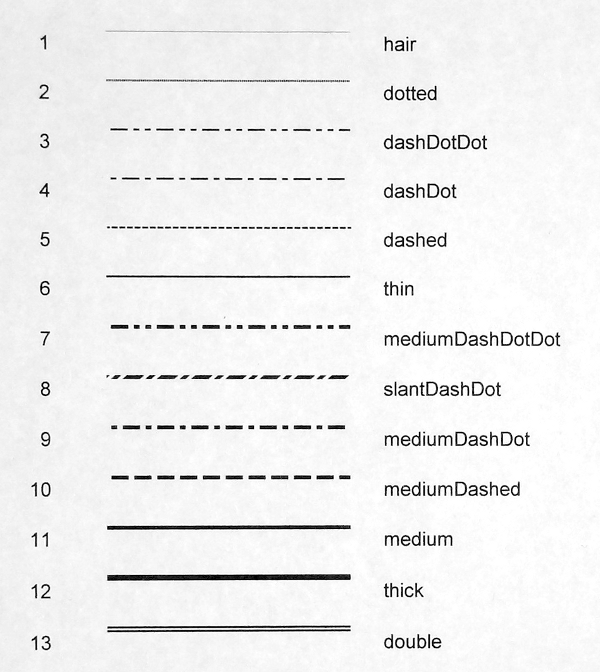
I’ll give you a side-by-side comparison of how the content of the same document gets displayed in Excel (2010), Calc 4.2 (before my change), and Calc master (with my change) all at 100% zoom level.
First up is Excel:

The lines all look correct, unsurprisingly. One thing to note is that when displaying Excel approximates a hairline with a very thin, densely dotted line to differentiate it from a thin line both of which are one pixel high. But make no mistake; hairline by definition is a solid line. This is just a trick Excel employs in order to make the hairline look thinner than the thin line counterpart.
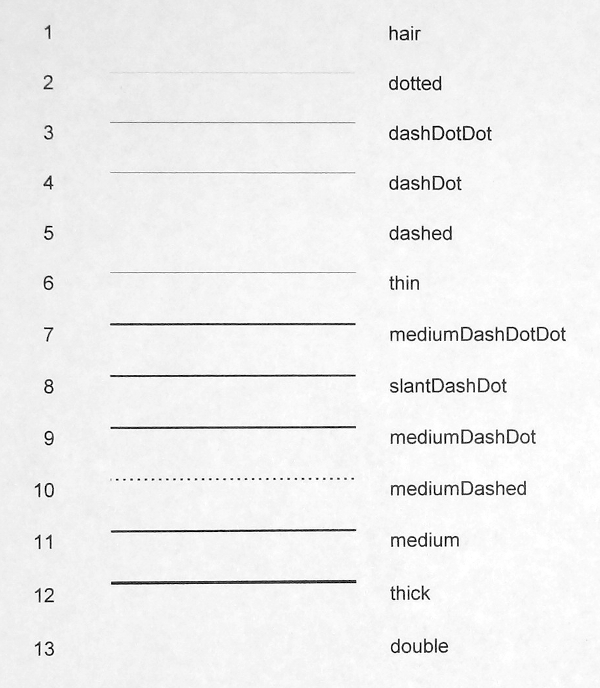
Then comes Calc as of 4.2 (before my change):

The hairline became a finely-dashed line both on display and in internal representation. Aside from that, both dashed and medium dashed lines look a bit too far apart. Also, the double line looks very much single. In terms of the line thicknesses, however, they do look very much comparable to Excel’s. Let me also remind you that Excel’s dash-dot and dash-dot-dot lines currently become solid lines in Calc because we don’t support these line types yet.
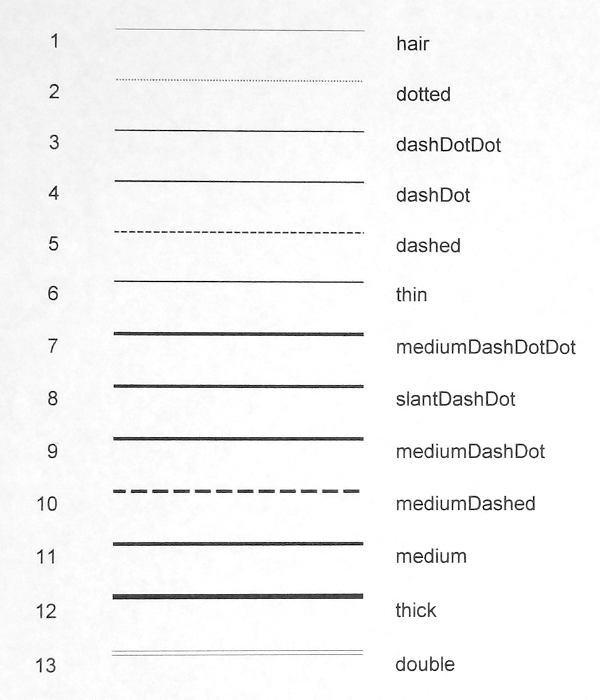
Now here is what Calc displays after my change:
The hair line is a solid line since we don’t use the same hair line trick that Excel uses. The dotted and dashes lines look much denser and in my opinion look better. The double line is now really double. The line thicknesses, however, are a bit off even though they are internally more comparable to Excel’s (as you saw in the printout above). This is due to the loss of precision during rasterization of the border lines, and for some reason they get fatter. We previosly tried to “fix” this by making the lines thinner internally, but that was a wrong approach since that also made the lines thinner even when printed, which was not a good thing. So, for now, this is a compromise we’ll have to live with.
But is there really nothing we can do about this? Well, we could try to apply some correction to make the lines look thinner on screen, and on screen only. I have some ideas how we may be able to achieve that, and I might give that a try during my next visit.
That, and we should also support those missing dash-dot, and dash-dot-dot line types at some point.